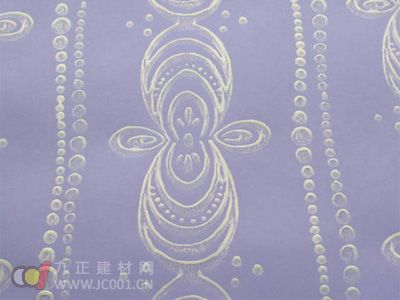
Compared to traditional wall paint, wallpaper offers a wide range of patterns, is easy to replace, provides better breathability, and is more environmentally friendly. That’s why many homeowners prefer it when they want a luxurious look and aren’t too concerned about the cost. The way you install the wallpaper directly affects the final appearance and future maintenance. In this guide, we’ll walk you through the entire process and highlight important tips to ensure a professional finish. Preparation Phase 1. Wall Preparation Before applying wallpaper, make sure the wall is in good condition. If there are any cracks or seams, use wall putty mixed with white glue (vinyl acetate resin) to fill them. Once the seams are repaired, let it dry. If the wall has loose dust or powder, sand it down to create a smooth surface. However, if the wall is too smooth, it may not hold the adhesive well—so sanding is necessary before applying the wallpaper. After these steps, apply a base coat to protect the wall and prevent moisture, salt, and alkali from seeping into the wallpaper, which can cause mold and damage over time. 2. Preparing the Paste The paste used for wallpaper is typically a mix of wallpaper glue powder and white glue. The consistency should be just right—thick enough to brush on but not too sticky. You can adjust the thickness by adding water. The wallpaper powder is usually made from natural starch, while the white glue is a synthetic resin. Depending on the type of wallpaper, the ratio of white glue to powder may vary. For example, cloth-based wallpapers require a thicker paste, often using 15 ounces of white glue per 15 ounces of powder. Special pastes for wall cloths can cover up to 5 square meters per kilogram. 3. Cutting the Wallpaper Unroll the wallpaper and check the pattern, direction, and alignment. Start from the top of the floor tile as your reference point. Measure the height of the wall, then lay the wallpaper on a flat surface with the adhesive side up and the pattern side down. Use a pencil to mark the length, then cut it with scissors. Make sure to leave an extra 30–50 mm at both ends for trimming, and lay the pieces flat for easy application. Mid-Construction Process Soak a roller in the prepared paste for about 30 seconds. When applying the glue, roll in one direction only, and angle the roller at 45 degrees to avoid wrinkles. Avoid rolling back and forth, as this can cause creases. Apply the glue smoothly and evenly, holding the roller in one hand and keeping the other hand steady on the uncoated area. After the main application, use a small brush to apply a thin layer of special glue (a 1:1 mix of powder and white glue) along the edges of the wallpaper. Once the wallpaper is on the wall, use a plastic scraper to press out any air bubbles, especially for vinyl wallpapers that are more water-resistant. If excess glue comes out, wipe it clean with a damp sponge. Be careful not to use a hard scraper, as it might damage the surface, causing issues like fading or visible seams. For high-quality textile wallpapers, use a short brush and be cautious not to get glue on the surface. If glue accidentally touches the surface, clean it immediately—once dried, it’s nearly impossible to remove without damaging the wallpaper. Final Inspection and Fixes After installation, check the following: Common Fixes:
The 20V 1200ml Cordless Battery-powered Paint Spray Gun make painting and varnishing much easier, with 30000 rpm speed,15Kpa working pressure.
No more tripping over cables or searching for the nearest power socket. With the cordless paint spray system, you can experience cordless freedom and enjoy an infinitely large action radius. For example, if you want to repaint your garden fence with as little effort as possible, the battery-powered paint spray gun offers you a number of advantages.
The Electric Paint Gun can spray 200DIN Latex paint, the atomization function will be best when using the 45-60DIN Latex Paint.
The material consumption speed is 484ml/min,when spray the Latex paint with 2.6mm Nozzle.
Paint with the HVLP Paint Sprayer, easy to paint the hard-to-reach areas and no need to clean the rollers and brushes.
Working close to the ground and painting overhead are easy for the Electric Paint Spray Gun.
You can spray on paint, varnish and glaze quickly, evenly and cleanly using as little material as possible – and it's also kind to your back, neck and shoulders.
Cordless Hvlp Paint Spray Gun,Cordless Brushless Paint Spray Gun,Cordless Hvlp Handheld Paint Sprayer,Cordless Hvlp Paint Sprayer Ningbo Brace Power Tools Co., Ltd , https://www.cnbrace.com