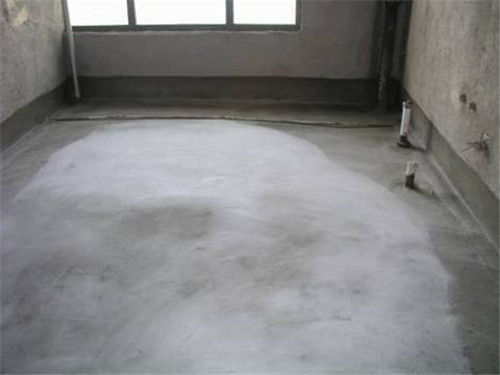
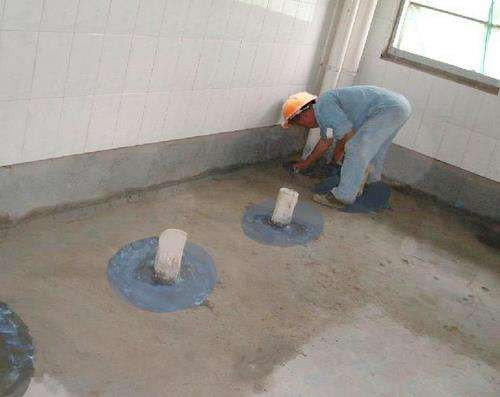
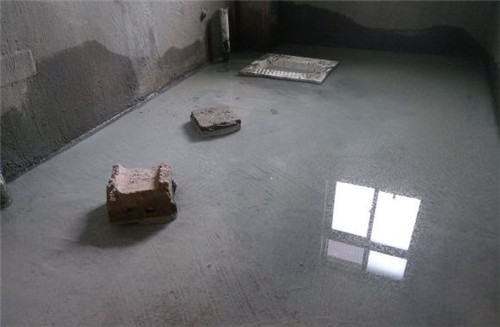
Because the water consumption of the bathroom will be relatively large, the waterproofing project should be in place, otherwise it will reduce the quality of life at home and affect the relationship with the neighbors downstairs. So, how to do bathroom waterproofing better? The following will introduce some bathroom waterproofing techniques for your reference. 1. How to do bathroom waterproofing-ground leveling and wall inspection Before making the bathroom waterproof, be sure to treat the bathroom floor and wall. If there is unevenness on the ground, it should be leveled; if there is a hollow phenomenon on the wall, it should be marked and then processed. Only after leveling the ground and the wall can you proceed to the next step. 2. How to do bathroom waterproofing-cleaning the ground and walls Next, we must carefully observe the ground and wall, if there are decoration impurities, we must clean up. At the same time, also check whether there are impurities in the drainage pipe and the sewer pipe. The impurities in these places should be cleaned up. Only in this way will it not affect the waterproofing of the bathroom, and will not cause the problem of bathroom clogging. 3. How to do waterproofing in the toilet After the ground and walls are processed, it is time to start painting with waterproof paint. special attention should be paid to the waterproof treatment of joints such as sewer pipes, light-weight walls, and flues when doing toilet waterproofing. These places must be strengthened for waterproofing. In addition, the waterproof height of the wall should be painted above 1.8 meters, so that even if the shower does not cause the wall to get wet, it will not affect the waterproof layer. 4. How to do waterproofing in the bathroom-water closing test After the waterproof coating is applied, wait until it is completely dry and then conduct a water-closing test. However, before doing the water shut-off test, first plug all the water outlets in the bathroom, and then place water in the bathroom with a height of about 2CM. The time for the water shut-off test is 24 hours. Then go to the neighbor's house downstairs to see if there is water seepage on the ceiling and walls. If not, it means that the waterproofing project is qualified and the waterproofing effect is good. 5. How to do bathroom waterproofing-clean up the site after the project After the waterproofing of the bathroom is completed, the decoration garbage and some discarded tools of the bathroom must be cleaned and recycled. Only if the ground and wall are kept clean and tidy, can the next step of laying tiles be carried out. Only a civilized construction will have a neat home living environment. Summary of the article: How to do the bathroom waterproofing better? The above content has a detailed explanation for everyone, I hope the above content can help everyone. If you want to know more related knowledge, you can pay attention to our website consultation, and more exciting content will be presented in the future. What, the decoration still uses his own money? ! The Qi family is decorated in installments, with an ultra-low annual interest rate of 3.55% and a maximum loan of 1 million. Apply now to enjoy the discount Diamond Electroplated Grinding Wheel DIY,special Guanghan Longrun Science and Trade Technology Trade Co., Ltd. , https://www.kairungongju.com